diff options
| author | Akshay <[email protected]> | 2020-04-09 17:07:20 +0100 |
|---|---|---|
| committer | Akshay <[email protected]> | 2020-04-09 17:07:20 +0100 |
| commit | d4c835c33ed4ed9add5a13f0a4745cdc8491fcaf (patch) | |
| tree | 416a366ddcead874ca58f9d9bb35bcf2b7144dfa /posts | |
| parent | 93618e9ff0419c5222b17bbb80b1a75e6cee425b (diff) | |
new post: Pixel art in GIMP
Diffstat (limited to 'posts')
| -rw-r--r-- | posts/pixel_art_in_GIMP.md | 134 |
1 files changed, 134 insertions, 0 deletions
diff --git a/posts/pixel_art_in_GIMP.md b/posts/pixel_art_in_GIMP.md new file mode 100644 index 0000000..cd9e7ad --- /dev/null +++ b/posts/pixel_art_in_GIMP.md | |||
| @@ -0,0 +1,134 @@ | |||
| 1 | I've always been an admirer of pixel art, because of it's | ||
| 2 | simplicity and it's resemblance to bitmap font design. | ||
| 3 | Recently, I decided to take the dive and make some art of my | ||
| 4 | own. | ||
| 5 | |||
| 6 | I used GIMP because I am fairly familiar with it. Aseprite | ||
| 7 | seems to be the editor of choice for animated pixel art | ||
| 8 | though. | ||
| 9 | |||
| 10 | ### Setting up the canvas | ||
| 11 | |||
| 12 | Picking a canvas size is daunting. Too small, and you won't | ||
| 13 | be able to fit in enough detail to make a legible piece. Too | ||
| 14 | big and you've got too many pixels to work with! | ||
| 15 | |||
| 16 | I would suggest starting out with anywhere between 100x100 | ||
| 17 | and 200x200. [Here's](https://u.peppe.rs/u9.png) a sample | ||
| 18 | configuration. | ||
| 19 | |||
| 20 | Sometimes I use a 10x10 grid, `View > Show Grid` and `Edit > | ||
| 21 | Preferences > Default Grid > Spacing`, but that can get | ||
| 22 | jarring at times, so I throw down a couple of guides, drag | ||
| 23 | right or down from the left or top gutters for vertical and | ||
| 24 | horizontal guides respectively. | ||
| 25 | |||
| 26 | ### Choosing a Brush | ||
| 27 | |||
| 28 | The most important part of our setup is the brush. Use the | ||
| 29 | Pencil Tool (`n` on the keyboard) for hard edge drawings. | ||
| 30 | Here's a small comparison if you don't know the difference | ||
| 31 | between a hard edge and a soft edge: | ||
| 32 | |||
| 33 | 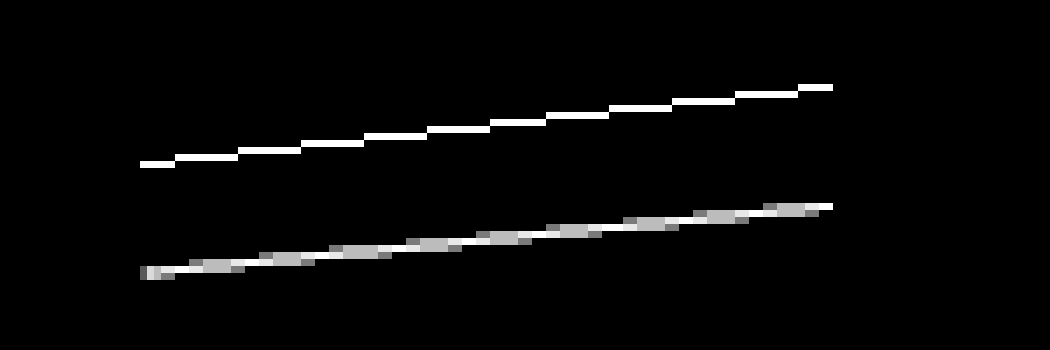 | ||
| 34 | |||
| 35 | I turn the size down all the way to 1 (`[` on the keyboard). | ||
| 36 | Set `Dynamics` off. [Here's](https://u.peppe.rs/Fs.png) a | ||
| 37 | sample brush configuration. | ||
| 38 | |||
| 39 | ### Laying down the pixels! | ||
| 40 | |||
| 41 | With the boring stuff out of the way, we can start with our | ||
| 42 | piece. I usually follow a three step process: | ||
| 43 | |||
| 44 | - draw a rough outline | ||
| 45 | - fill in the shadows | ||
| 46 | - add highlights | ||
| 47 | |||
| 48 | But this process are better explained with an example: an | ||
| 49 | onigiri. Let us start off with a 100x100 canvas. | ||
| 50 | |||
| 51 | #### Drawing the outline | ||
| 52 | |||
| 53 | For the most part, our figure will be symmetric. If you are | ||
| 54 | on GIMP 2.10+, you can take advantage of the Symmetry | ||
| 55 | Painting feature. Go ahead and enable vertical symmetry, | ||
| 56 | `Window > Dockable Dialogs > Symmetry Painting` and | ||
| 57 | `Symmetry Painting > Symmetry > Mirror > Vertical`. Your | ||
| 58 | outline might look something like this: | ||
| 59 | |||
| 60 | 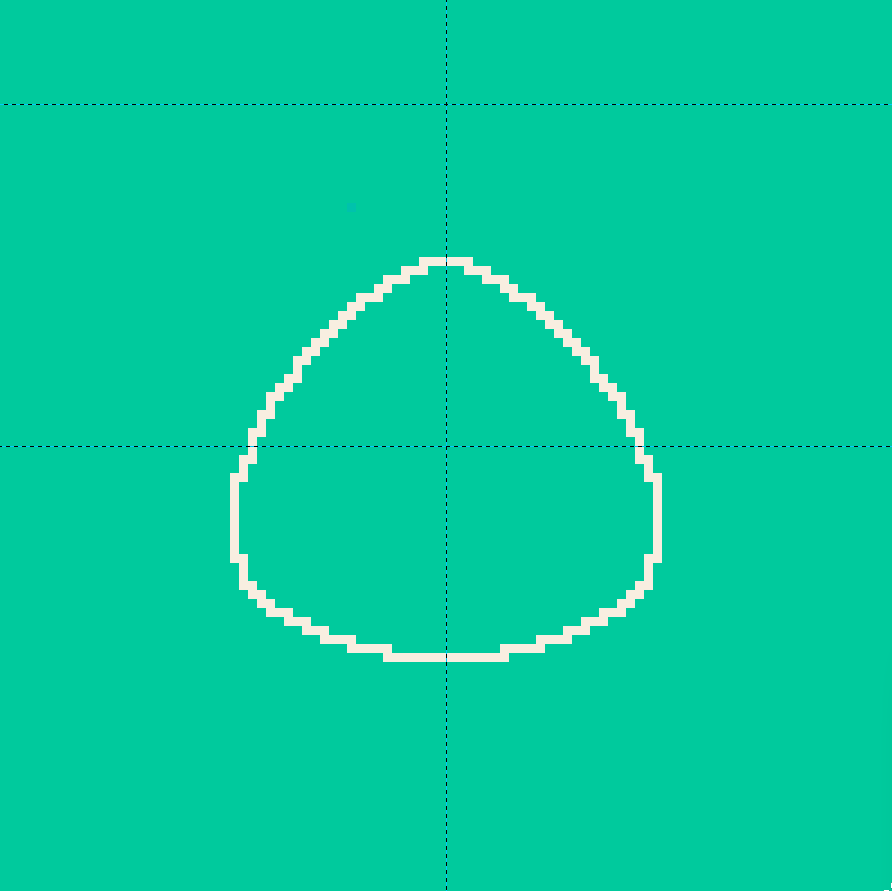 | ||
| 61 | |||
| 62 | Go ahead and fill it in with the fill tool (`Shift + b` on | ||
| 63 | the keyboard), add in some seaweed as well, preferably on a | ||
| 64 | different layer. You can toggle symmetry on and off to save | ||
| 65 | yourself some time. | ||
| 66 | |||
| 67 | 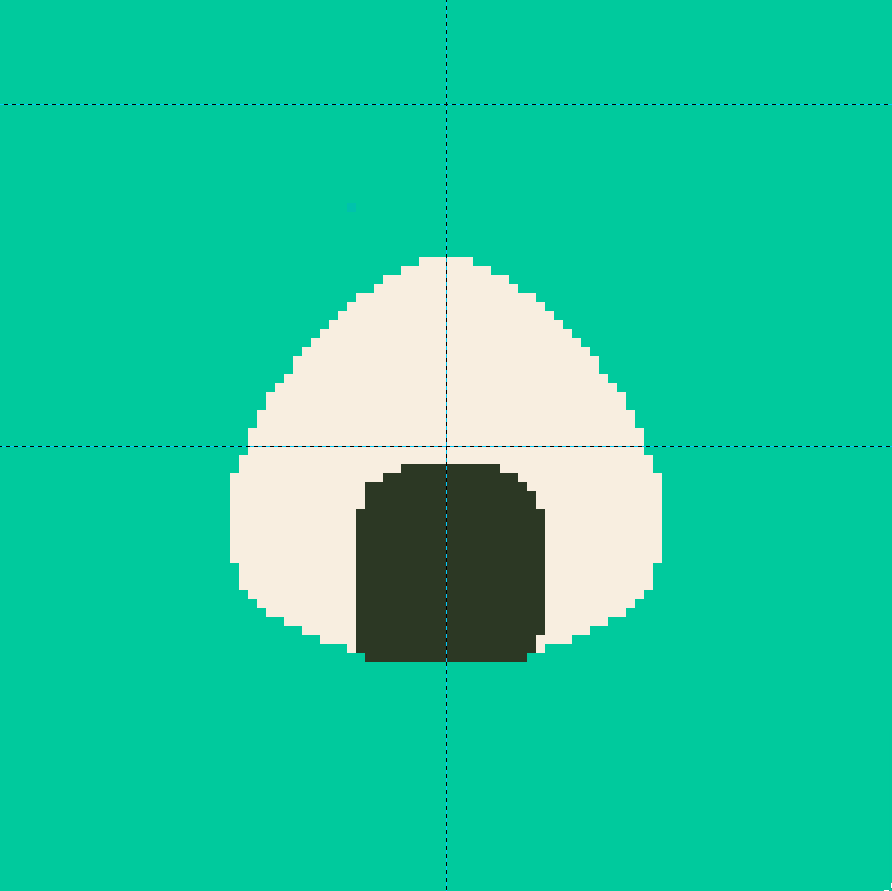 | ||
| 68 | |||
| 69 | #### Shadows | ||
| 70 | |||
| 71 | For now, let us focus on the shadows on the object itself, | ||
| 72 | we'll come back to the shadows cast by the object on the | ||
| 73 | surface later. | ||
| 74 | |||
| 75 | Shadows on any surface always follow the shape of the | ||
| 76 | surface. A spherical onigiri would have a circular shadow: | ||
| 77 | |||
| 78 | 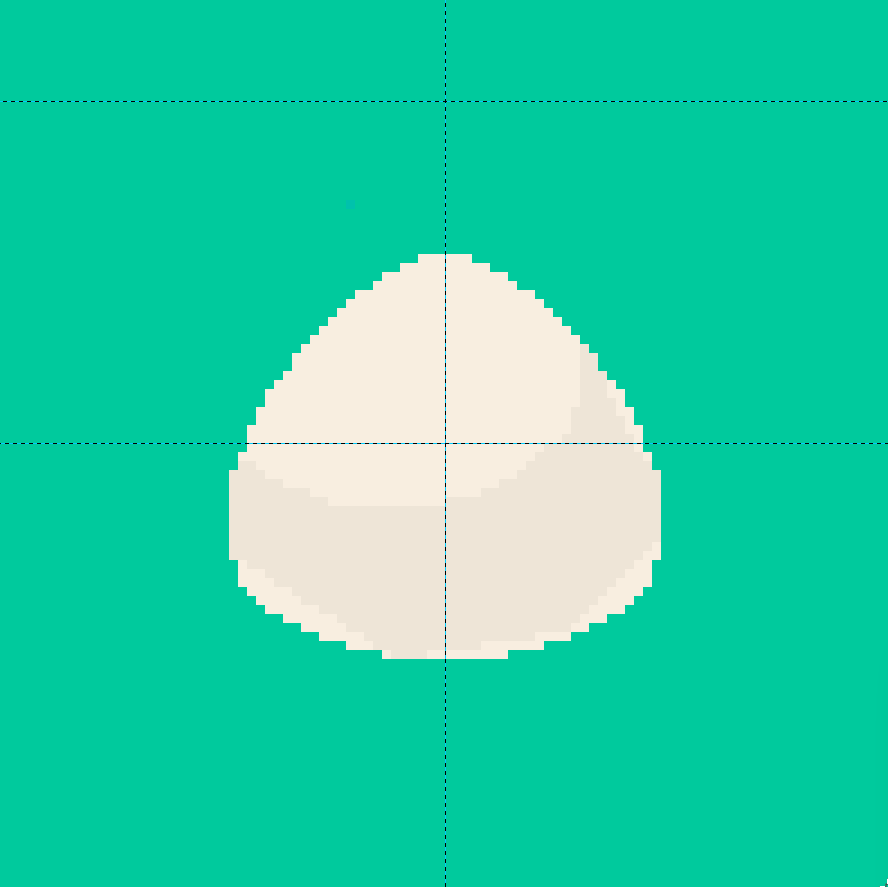 | ||
| 79 | |||
| 80 | A couple of noticeable changes: | ||
| 81 | |||
| 82 | **Layers**: The layer containing the seaweed has been hidden. | ||
| 83 | **Color**: The color of the shadow is just a slightly | ||
| 84 | lighter version of the original object (reduce the Value on | ||
| 85 | the HSV scale). | ||
| 86 | **Area**: The shadow does not go all the way (notice the bottom | ||
| 87 | edges). | ||
| 88 | |||
| 89 | The shadow does not go all the way because we will be | ||
| 90 | filling in that area with another, darker shadow! An image | ||
| 91 | might explain better: | ||
| 92 | |||
| 93 | 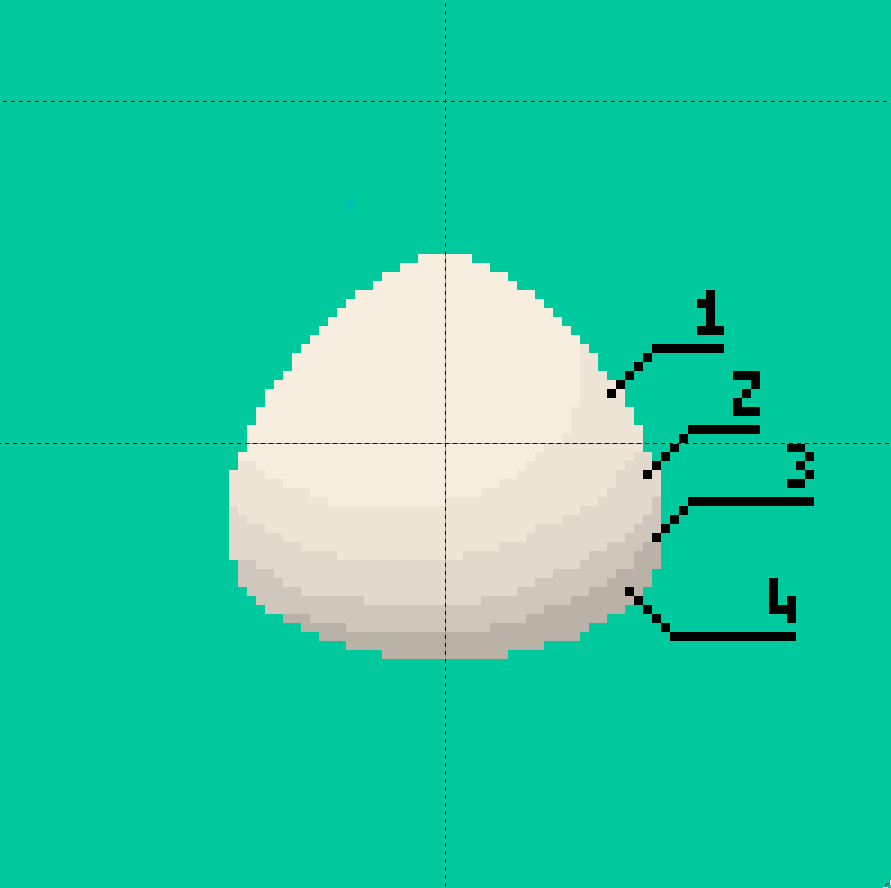 | ||
| 94 | |||
| 95 | To emulate soft lights, reduce the value by 2 to 3 points | ||
| 96 | every iteration. Notice how area `1` is much larger than | ||
| 97 | area `4`. This is because an onigiri resembles an oblate | ||
| 98 | spheroid, a sphere that is slightly fatter around the | ||
| 99 | middle, and areas `1` and `2` catch more light than areas | ||
| 100 | `3` and `4`. | ||
| 101 | |||
| 102 | Do the same with the seaweed. The seaweed, being a smaller, | ||
| 103 | flatter object, doesn't cast much of a shadow, so stop with | ||
| 104 | 1 or 2 iterations of the gradient: | ||
| 105 | |||
| 106 | 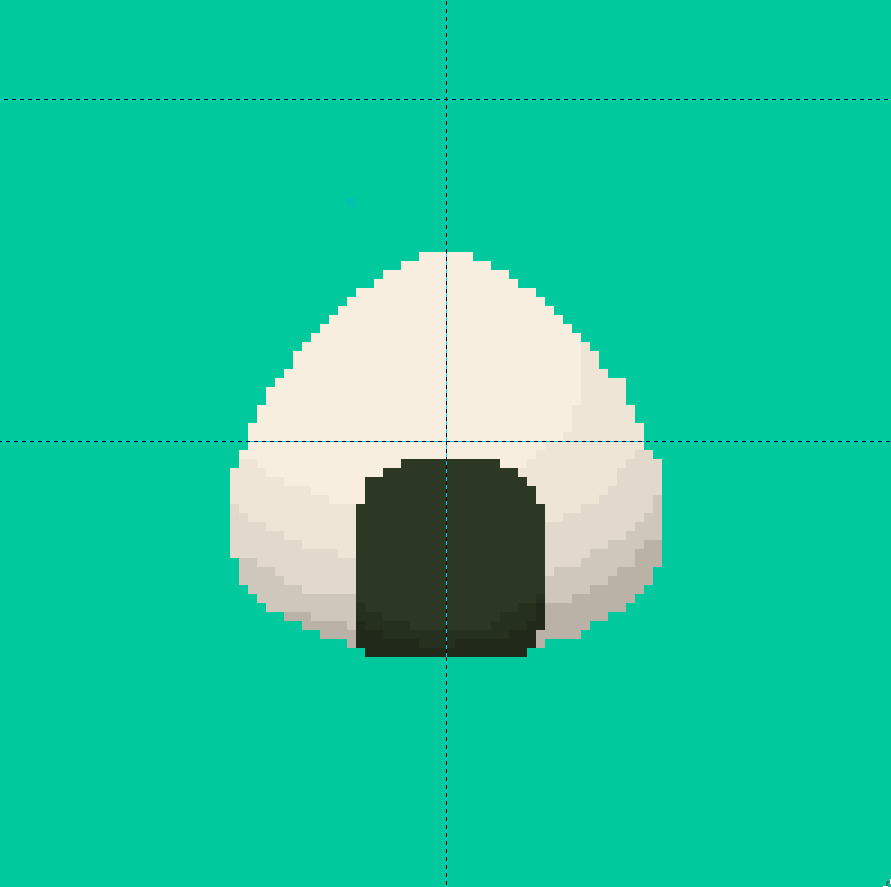 | ||
| 107 | |||
| 108 | We're getting there! | ||
| 109 | |||
| 110 | #### Highlights | ||
| 111 | |||
| 112 | This step handles the details on the strongly illuminated | ||
| 113 | portions of the object. Seaweed is a bit glossy, lighten the | ||
| 114 | edges to make it seem shiny. The rice is not as shiny, but | ||
| 115 | it does form an uneven surface. Add in some shadows to | ||
| 116 | promote the idea of rice grains. Here is the finished | ||
| 117 | result: | ||
| 118 | |||
| 119 | 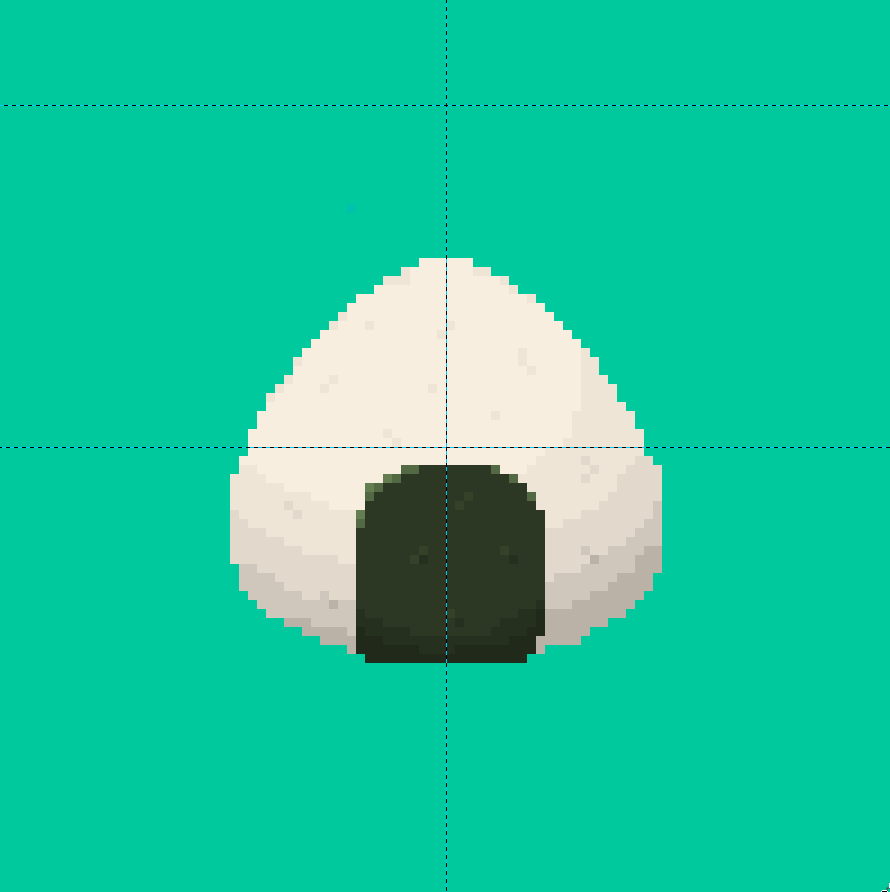 | ||
| 120 | |||
| 121 | ### Finishing Touches | ||
| 122 | |||
| 123 | Some color correction and `a e s t h e t i c` Japanese text | ||
| 124 | later, our piece is complete! | ||
| 125 | |||
| 126 |  | ||
| 127 | |||
| 128 | Hold on, why is it so tiny? Well, that's because our canvas | ||
| 129 | was 100x100, head over to `Image > Scale Image`, set | ||
| 130 | `Quality > Interpolation` to `None` and scale it up to | ||
| 131 | 700x700, et voilà! | ||
| 132 | |||
| 133 | 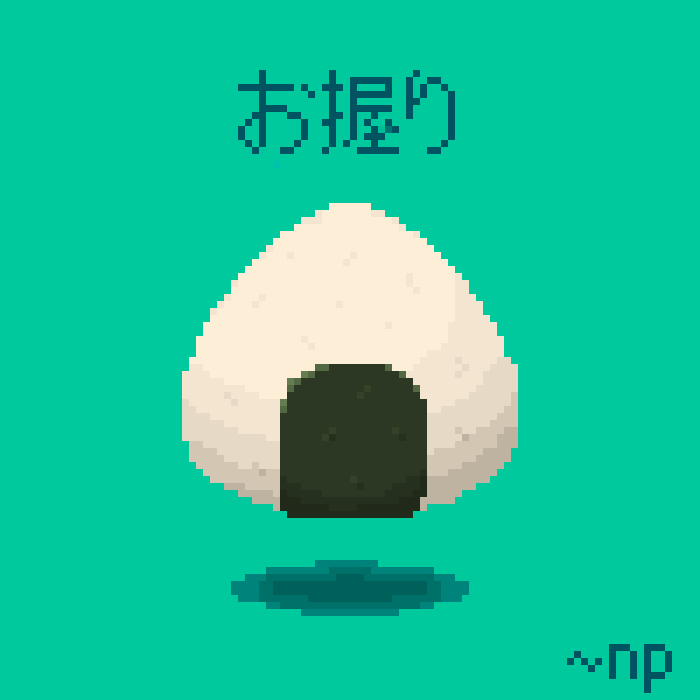 | ||
| 134 | |||
