
diff options
| author | Akshay <[email protected]> | 2020-04-09 17:29:06 +0100 |
|---|---|---|
| committer | Akshay <[email protected]> | 2020-04-09 17:29:06 +0100 |
| commit | f994d48aa6eef04501519f1d1b24e20d12de2cbb (patch) | |
| tree | 23d29ce55ea978ce0d6a3f9a5766b5185286dd05 /posts | |
| parent | d4c835c33ed4ed9add5a13f0a4745cdc8491fcaf (diff) | |
fix grammar, add more info to pixel art
Diffstat (limited to 'posts')
| -rw-r--r-- | posts/pixel_art_in_GIMP.md | 23 |
1 files changed, 14 insertions, 9 deletions
diff --git a/posts/pixel_art_in_GIMP.md b/posts/pixel_art_in_GIMP.md index cd9e7ad..be925ca 100644 --- a/posts/pixel_art_in_GIMP.md +++ b/posts/pixel_art_in_GIMP.md | |||
| @@ -19,8 +19,8 @@ configuration. | |||
| 19 | 19 | ||
| 20 | Sometimes I use a 10x10 grid, `View > Show Grid` and `Edit > | 20 | Sometimes I use a 10x10 grid, `View > Show Grid` and `Edit > |
| 21 | Preferences > Default Grid > Spacing`, but that can get | 21 | Preferences > Default Grid > Spacing`, but that can get |
| 22 | jarring at times, so I throw down a couple of guides, drag | 22 | jarring, so I throw down a couple of guides, drag right or |
| 23 | right or down from the left or top gutters for vertical and | 23 | down from the left or top gutters for vertical and |
| 24 | horizontal guides respectively. | 24 | horizontal guides respectively. |
| 25 | 25 | ||
| 26 | ### Choosing a Brush | 26 | ### Choosing a Brush |
| @@ -45,7 +45,7 @@ piece. I usually follow a three step process: | |||
| 45 | - fill in the shadows | 45 | - fill in the shadows |
| 46 | - add highlights | 46 | - add highlights |
| 47 | 47 | ||
| 48 | But this process are better explained with an example: an | 48 | But this process is better explained with an example: an |
| 49 | onigiri. Let us start off with a 100x100 canvas. | 49 | onigiri. Let us start off with a 100x100 canvas. |
| 50 | 50 | ||
| 51 | #### Drawing the outline | 51 | #### Drawing the outline |
| @@ -54,8 +54,13 @@ For the most part, our figure will be symmetric. If you are | |||
| 54 | on GIMP 2.10+, you can take advantage of the Symmetry | 54 | on GIMP 2.10+, you can take advantage of the Symmetry |
| 55 | Painting feature. Go ahead and enable vertical symmetry, | 55 | Painting feature. Go ahead and enable vertical symmetry, |
| 56 | `Window > Dockable Dialogs > Symmetry Painting` and | 56 | `Window > Dockable Dialogs > Symmetry Painting` and |
| 57 | `Symmetry Painting > Symmetry > Mirror > Vertical`. Your | 57 | `Symmetry Painting > Symmetry > Mirror > Vertical`. |
| 58 | outline might look something like this: | 58 | |
| 59 | If you are running an older version of GIMP, draw in the | ||
| 60 | left side, duplicate the layer, flip it horizontally, and | ||
| 61 | merge it with the original. | ||
| 62 | |||
| 63 | Your outline might look something like this: | ||
| 59 | 64 | ||
| 60 | 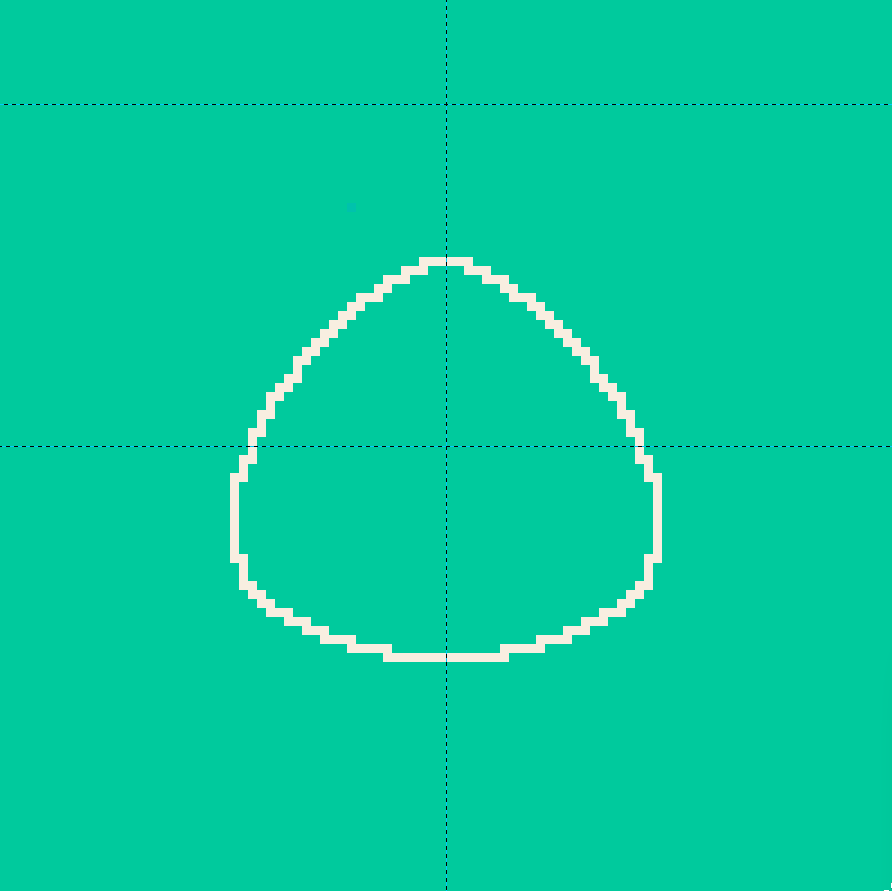 | 65 |  |
| 61 | 66 | ||
| @@ -94,10 +99,10 @@ might explain better: | |||
| 94 | 99 | ||
| 95 | To emulate soft lights, reduce the value by 2 to 3 points | 100 | To emulate soft lights, reduce the value by 2 to 3 points |
| 96 | every iteration. Notice how area `1` is much larger than | 101 | every iteration. Notice how area `1` is much larger than |
| 97 | area `4`. This is because an onigiri resembles an oblate | 102 | area `4`. This is because an onigiri resembles a bottom |
| 98 | spheroid, a sphere that is slightly fatter around the | 103 | heavy oblate spheroid, a sphere that is slightly fatter |
| 99 | middle, and areas `1` and `2` catch more light than areas | 104 | around the lower bottom, and areas `1` and `2` catch more |
| 100 | `3` and `4`. | 105 | light than areas `3` and `4`. |
| 101 | 106 | ||
| 102 | Do the same with the seaweed. The seaweed, being a smaller, | 107 | Do the same with the seaweed. The seaweed, being a smaller, |
| 103 | flatter object, doesn't cast much of a shadow, so stop with | 108 | flatter object, doesn't cast much of a shadow, so stop with |